


Learn How To Use Ableton 9 And 10 With The Push Controller Part 1
- Mar 8, 2018
- 4 min read
Welcome to the first installment of learning how to sequence and program beats using Ableton’s flagship Push controller.
First we’ll look into everything you can accomplish with this innovative piece of hardware.
In the second part we’ll be covering the basics of how you can start sequencing your own ideas and manipulating your own sounds.
The original Push was designed as a groundbreaking MIDI controller that works seamlessly with Ableton Live to improve the sequencing aspect of the software.
With the addition of Push 2, Akai and Ableton decided to add much needed functionality to improve its already innovative workflow.

With Push you can:
-Record everything you play
-Perform and sequence all of your ideas using the 64 LED lit pads
-Browse through presets
-Manipulate and Tweak samples on the fly
-Slice your beats and samples across the pads
-You can access all of your plugins and samples as well as Ableton’s devices and content
-Lay out and compose a complete song
-Perform in Scale mode to create ideas that are always in the right key
-Adjust and manipulate any parameter in Live
-Mix and fine tune your levels
-Add Visual feedback by color coding pads during sequencing
-Adjust Midi note lengths
-Copy and paste clips
-Zoom in and out of samples to get the most detailed view of your waveforms
-Advanced effect visualization
Ableton has made setting up Push pretty straightforward with no need for drivers. As long as Live is running, Push will be automatically detected as soon as it's connected to your computer. After you connect the device, it will automatically synchronize to Ableton’s layout.
Loading a kit
To start creating beats using Push, first we’ll need to make sure Note Mode is enabled.
Then use the Browse Mode function to navigate to one of the Drum Rack presets from Live’s library. When working with a MIDI track containing a Drum Rack, Push’s pads can be configured in numerous ways, depending on the state of the Note button. Pressing this button switches between three different layouts.
Sequencing The Beats
Pressing a pad enables it for step sequencing. To record notes into the Push sequencer, tap the pads in the step sequencer mode to place notes in the clip where you want them. The clip will begin playing as soon as you tap a step. By default, each step sequencer pad corresponds to a 16th note value, you can adjust the size of the step using the corresponding buttons in the Scene/Grid section on the device.
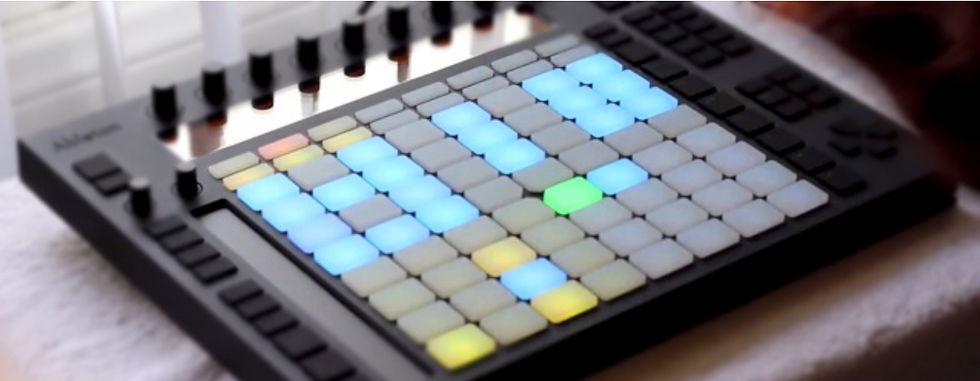
When the clip is playing, the step will be indicated by the moving green pad in the step sequencer section. If record is enabled, the moving pad will be red. if you want to delete a note just press it again and it will vanish from the sequence. Press and hold the Mute button while tapping a step to deactivate it without deleting it.
Press and hold Solo while tapping a pad to solo that sound.
To delete all notes for a pad, press and hold Delete while tapping the pad. keep in mind this will only delete notes that are within the current sequenced loop.
Loading and replacing Individual Drum cells in the Drum Rack
If we want to load our own sounds and samples into a Drum rack we can replace individual pads within a loaded kit. To switch between browsing Drum Racks and single pads, press the Device button to show the devices on the track.

The first thing you’ll notice is that by default, the Drum Rack is selected, as indicated by the arrow in the display. To select an individual pad instead, tap that pad, then press the selection button below the pad’s name.
If we go back to Browse Mode again it will allow you to load or replace the sound of only the selected pad. Once in Browse Mode, tapping other pads will enable them for browsing, making it so you can quickly load multiple samples within the loaded Kit.
Performing and Playing your ideas in Real Time
Your patterns can also be recorded by playing/performing in real time. Here are the steps to record your performance.
First thing you’ll want to do is press the Record button on the device. From here your Drum Rack pads will be recorded to the clip. If you press record again it will stop recording the performance but it will continue playing the sequence. If you tap record three times it will enable overdub mode, This will allow you to record into the clip while it plays back.

If you want to create another clip, press the 'New' button which will stop playback of the current clip and enables Ableton to record a new clip on that same track. Tapping New also duplicates all of the clips that are playing on other tracks to a new scene and continues playing them.
Quantizing your performance
Once we press Quantize this will bring up 'Quantize To' on the Push display.
This function will snap the sequence to the nearest note value. 'Quantize Amount 'will set the amount that notes can be moved from their original positions.

If your trying to get specific with Quantization on an individual drum sequence, press and hold Quantize and tap a Drum Rack pad to quantize only that drum’s notes in the current clip.
If you want to Quantize while recording, you'll want to 'Enable Record Quantize' this will set to automatically quantize notes while they are recording and adjust the record quantization value with the last knob in the display (Encoder 8).
This concludes Part 1 on Learning how to use Ableton with Push
Ready To Become a Top DJ/Producer Yourself?
Comments